September 29, 2010

Canvas Photo Art


These are very easy to make and great gifts to make for family and friends.  You can get canvas in all different sizes. They are fairly inexpensive and you can find them at local craft stores, art supply stores and even at some discount stores.

Supplies: Canvas
                 Photos
                 Colored Paper
                 Ink Pads or Chalk Stamp Pads
                 Ribbion
                 Adhesives
                 Stickers, Embellishments, anything you want to add
Directions: 
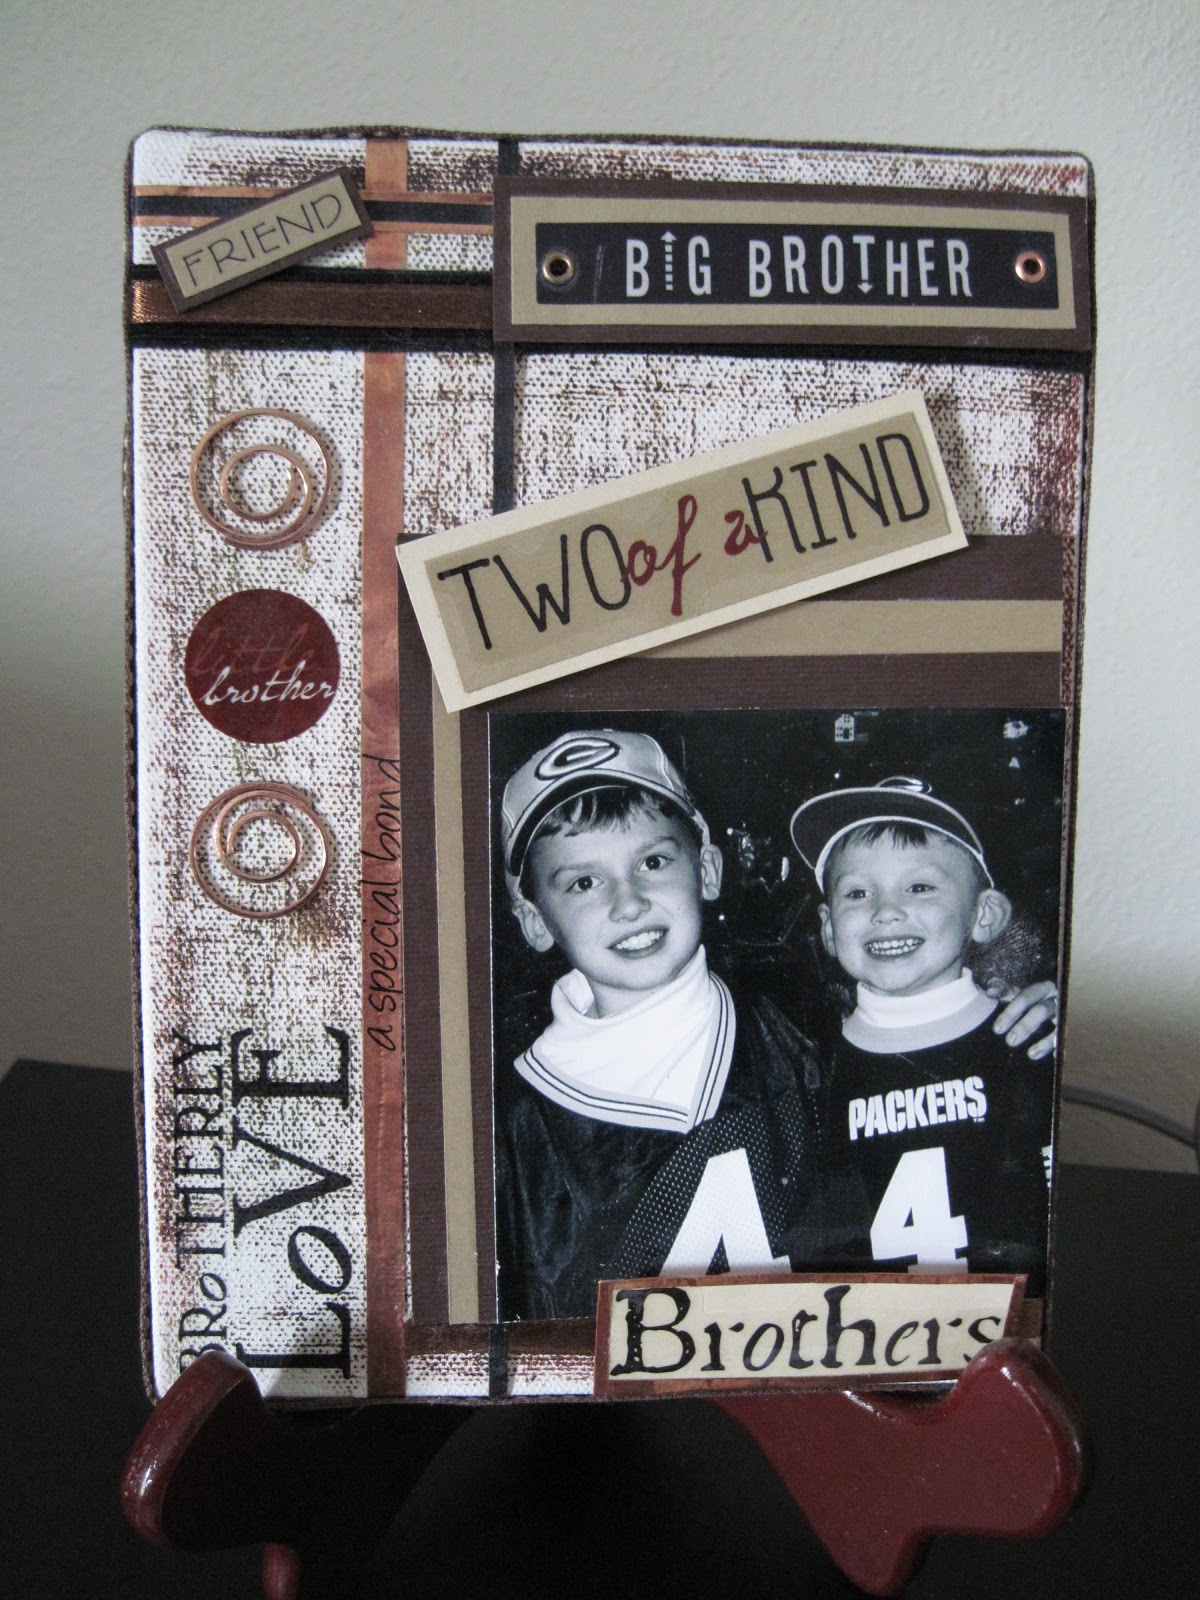
1. Use your ink pads to cover the canvas. You can dab the ink pads onto the canvas, you can rub them on, you can drag them across the canvas. You can use more than one color. You can use a brush to soften the look. You can even you paint if you want. There is no right or wrong.
2. After the canvas is colored and dried, you can add ribbion around the outer edges if needed.
3. Now prepare your photo or photos . I usually add colored paper behind the photos to add interest.
4. Decide where you want your photo to go on the canvas.
5. Attach your photo with a good adhesive. I often use glue dots with this project.
6. Now add your embellishments, these can be anything from stickers, to brads, flowers, keys, whatever works for you.
7. Sometimes I just keep adding things for a day or two until I feel like it's done.
8. I often display these on stand up plate holders.They are cheap and easy to find.
9. You also can use scrapbook paper to cover the canvas if you don't want to use inks or paints. Take a look at a few samples I have below.

CHECK OUT THE $1.00 SECTION AT YOUR LOCAL CRAFT STORE FOR SMALL CANVAS SQUARES. THESE CAN BE MADE INTO GREAT ORNAMENTS FOR CHRISTMAS GIFTS! ADD THE CHILDS SCHOOL PHOTO AND A RIBBION TO HANG IT BY!!

September 28, 2010

Tuesday Tool - QuickStik Scrapbook Tool


This tool is perfect for all kinds of crafting projects. You can use it for any of those small items that are hard to place in just the right spot. No more having those small pieces sticking to your fingers, with this tool, placement is so easy. It retails for around $7.00, but I got mine at Archivers and was able to use my 30% off coupon. Money well spent if you are a crafter! It picks up paper,beads, tiny brads, embellishments, etc.

September 24, 2010

Soda Can Desk Organizers


These organizers are a great way to group your supplies together.  They work really well for pencils, pens, paint brushes, etc. Great activity for kids. You get the cans ready and then they can decorate them. 

Supplies: Soda Cans - empty and cleaned out
               Scissors
               Duct Tape
               Paper
              Adhesive - I used a tape runner
              Ribbion, trim, embellishemnts - it's up to U
              Wire
              Beads
              Hole Puncher
              Stapler

Directions:
1. Using your scissors, cut the top off the two soda cans. Cover the tops of the can with duct tape to cover the sharp edges.  Then you are ready to wrap your cans in the paper you have picked out. I measure the can and then mark the paper to the size needed and cut out. Make sure the paper wraps around a bit to cover the seam.
2. Now you can add any ribbion or trim to the tops of the can ( Do this before you staple the two cans together).
3. Now putting the seams facing towards eachother in the middle, staple the two cans together. I usually put in two to three staples.
4. Now you can use the hole punch and punch holes on each side for handles.
5. For the handle, I like to cut a piece of wire and thread beads onto it. Pipecleaners with beads also works well.
6. Attach the handle to each side, twist wire around the handle a few times to make sure it stays in place.
7. Now you are ready to add embellishments such as buttons, ribbon, rick rack, photos, whatever you have!
8. Fill with your supplies and you are now ORGANIZED!!!


September 23, 2010

Glitter Pumpkin Totes


  Do you find yourself with several of those pumpkin totes that the kids used to Trick or Treat with.
  My kids are older now and they were just sitting in my basement collecting dust.
  So I desided to give them a new use. By covering the totes with glitter, they became great holiday planters.
  They are so easy to make and they are a Great Hostess Gift!


Supplies : Plastic Totes
               Glitter - I used black and orange on this one.
               Modge Podge - this is your adhesive
               Clear Acyrlic Spray
               Paint Brushes - a variety of sizes
               Box or container to work over.

Directions: 1. Start with the face on the pumpkin and using a paint brush, cover the area with Modge Podge.
                 2. Pour glitter over the area that you covered with adhesive.
                 3. Let the face dry for 30-60 minutes before switching colors.
                 4. Now work in small sections when applying the Modge Podge. It dries fast!!!
                5. Continue to work in sections putting down adhesive and then covering in glitter.
                6. Once the entire tote is covered in glitter, let in dry for 24 hours.
                7. Now you can spray the tote (in well vented area) with clear acrylic spray.
                8. Item will be tacky to the touch until it dries. I usuall give it 2-3 coats to keep the glittter in place.
                9. Once it is dry you can fill the tote with whatever you like. I added a bow with my Mum Plant.

*** This can be a bit messy, but the glitter vacuums right up and a damp cloth will clean up your work table.


September 21, 2010

Tuesday Tool - Create-A-Sticker

I can't say enough about this tool. You can turn anything that is flat and no more than 11/2 inches wide into a sticker. This means you can put all those hard to glue items in this machine make them into stickers and now you can easily place them where you want them.

It is great for ribbon. No more searching for the right adhesive to use use on your ribbions, this works great. You also can make these stickers ahead of time and use them whenever you want.

Think of what you could do for Birthday Parties!!! Personalized stickers look great on the back side of your envelopes when sending out cards and invitations.

The Xyron Create-A-Sticker can be found at craft and discount stores all over and on-line at many on-line stores.  You can get the refill cartridges in Permenent and Repositionable Adhesive.

A great gift for those young crafters around 9-10 years old that love to make things by hand.

September 20, 2010

ID Tag Photo Albums


These are very easy to make. You can make the cover with any type of heavy cardboard - I even use cereal boxes! The are the perfect size for all those wallet size photos we get.

Supplies: ID Tags - Usually 12 in a package at discount or office supply stores.
              Binding Rings ( 2)
              Cardboard
              Decorative Paper
              Adhesive
              Hole Puncher
              Embelishments

Directions:
1. Cut 2 pieces of cardboard for your book covers - make them just a bit bigger then tags.
2. Use the tags as a guide to line up the hole for your binding rings. Punch 2 holes in each piece, for front and back cover.
3. Pick out the paper you want for front and back. Scraps work great. I used glue stick to cover one side of cardboard and placed it in the middle of the back side of paper. I folded the sides over and used adhesive to keep them in place. Punch holes through the decorative paper. Add another piece of paper to the otherside of the cover to give it a nice finished look.
4. Now you can decorate the front and back with any embelishments you like.
5. You can now put your book together. Stack back cover with number of tag ID Pages you want ( you can always add more). Place cover on top and add your binding rings to the holes.
6. You can decorate the rings with ribbon or beads.

**** Next time you print photos from an event, get them printed in wallet size and make a book to remember the event.  Makes a great gift after a special party.


September 10, 2010

Candy Wrapper Jewlery


Supplies Needed:
• Candy Bar Wrappers from small size bars.
• Straws – any size or color
• Glue
• Clear Scotch tape
• Stretchable Cord
• Beads
• Small Paintbrush

1. Take empty candy wrappers and trim them down, cutting off the ends and leave the logo of the candy to show.
2. Brush a light coat of glue on the backside of the candy wrapper.
3. Roll the wrapper around a straw. If there is too much wrapper, trim away the extra.
4. Cover the seam with clear scotch tape. This helps keep things in place as it dries.
5. Repeat this several times as you will want several beads to make your jewelry pieces.
6. Once the glue dries, this takes a few hours, you can cut the straw into tiny pieces. The pieces can be whatever size you want your beads to be.
7. Now you can start to place your candy wrapper beads and other decorative beads on your stretchable cord.
8. Once you have the length you want, tie the cord into a knot. ( I usually tie a few knots).
9. Your jewelry is now ready to wear.


***With Halloween coming, this is a great way to use up those candy wrappers.
*** You can also use leftover scrapbook paper to make beautiful beads.


September 9, 2010

Purse Gift Bags


Supplies Needed:
*Lunch Bags or Small paper bags
*Assorted Papers
* Glue, Adhesive of choice
* Embellishments
* Handles – Ribbon, pipe cleaner, wire with beads, etc.
* Something to help you cut the circles, either a circle cutter, a stencil, even a plate from the kitchen.
* Paper Hole Puncher
*Velcro


1. Cut the lunch bag down to the size wanted. I usually take around 4 inches off the top of a lunch bag.
2. Measure the width of the bag. Cut a piece of paper to cover the front of your bag. You can also cut a piece to cover the back if you want to.
3. Using your adhesive, glue the paper to the front and back of the bag.
4. Cut your circle which will be the top flap of the bag. Make sure that the circle is as wide as the bag. After it is cut, fold it in half. As you can see in the photo I often make a second circle just a bit smaller than the first one out of a different paper pattern. This is just a step I do to add a little interest. It will work just fine with one circle being used.
5. Now you need to make two holes in the fold of the circle for the handles with your hole puncher.
6. Add whatever type of handle you like. I often find great things to use in old leftover supplies from when my kids were little. Plastic beads with letters on them work great to add special messages to your handles.
7. Once your handle is in place tape the end pieces to the back half of the circle. This will not show after you glue it to the bag.
8. Now use your adhesive and glue the back half of the circle to the top of the bag on the back side.
9. Now flip the flap over and this will close your bag.
10. I like to use a round Velcro piece to keep the bags closed.
11. Add any embellishments you like and you are done

September 7, 2010

Paper Clip Book Marks


Supplies:
*Paper Clips
* Paper
* Punchers or Stencils
*Embellishments
*Adhesive of your choice – I have used glue sticks, adhesive runners, sticker maker, etc.

These are quick and EASY to make and a Great Gift for Teachers and fellow readers.

1. Gather up large or jumbo paper clips
2. Using punches (if you have them) or stencils, cut out the shapes you would like for your bookmark. You will need 2 pieces – 1 front and 1 back.
3. Decorate the front piece with whatever embellishments you care to use.
4. Add adhesive to the wrong side of the back piece. (If you have a sticker maker, this works great.)
5. Place top side of paperclip on top of adhesive. Now cover back piece and top of paperclip with front piece. Add extra adhesive if needed.
6. YOU ARE DONE! THAT EASY!